2/18/2022

How to Use VXDIAG VCX NANO with ForScan, FJDS, FDRS?

 Vxdiag vcx nano for Ford/Mazda has been tested as a good j2534 passthru interface. VCX NANO works perfectly with IDS, ForScan, FJDS and FDRS as a J2534 pass-through device.

IDS (Ford Integrated Diagnostic System) allows dealership technicians to diagnose and service Ford, Lincoln, Mercury vehicles. As the new diagnostic tool, IDS will be required to perform diagnostics on future model year vehicles.

FJDS ( Ford J2534 Diagnostic Software) is the new version of Ford Module Programming, and the interface is clunky like IDS. FJDS does not have the same level of diagnostics as IDS but if you need to program modules, change some parameters, etc

FDRS (Ford Diagnostic & Repair System) is the official dealer diagnostic and repair software used by technicians at your dealership. It can test (run diagnostics) on various modules, update module software, load/reload as-built configurations etc.

ForScan is mostly used for module configuration (it cannot do module software updates).

  • Set up VXDIAG with Ford IDS
  • Set up VXDIAG with Ford ForScan
  • Set up VXDIAG with Ford FJDS/ FDRS

Set up VXDIAG VCX NANO with Ford IDS

The latest version IDS for VXDIAG goes to V124 (till Feb, 2022)

Free Download VXDIAG Ford IDS V124

https://mega.nz/folder/6dwzgaJR#XW2q1xPdbgKV4XtZQqkB0w

Including
FordIDS-124.01_full.exe
VCI_Software_1.0.0.10.exe
VCI Manager (Ford) 20.11.24.exe

Ford IDS V124 Installation Instruction 

1. Install IDS Software
2. Install VCI_Software_1.0.0.10
3. Install VCI Manager(Ford) 20.11.24

Install Ford IDS-124
Wait for the installation of Ford IDS – 124.01, and restart the computer
Install the Ford original VCI software_ 1.0.0.10.exe
Install VX manager and Ford IDS driver
Wait for VX manager and Ford VCI driver installation to complete
Connect VCX device and install idspatch
Use idspatch to open IDs and start diagnosis.


How to set up and install VXDIAG Ford IDS on Windows 10?


Set up VXDIAG VCX NANO with Ford ForScan

This is how to set FORScan to detect and work with Vxdiag Vcx Nano for Ford.

First of all install VX Manager and this passthru driver:

Set up VXDIAG VCX NANO with Ford ForScan 1

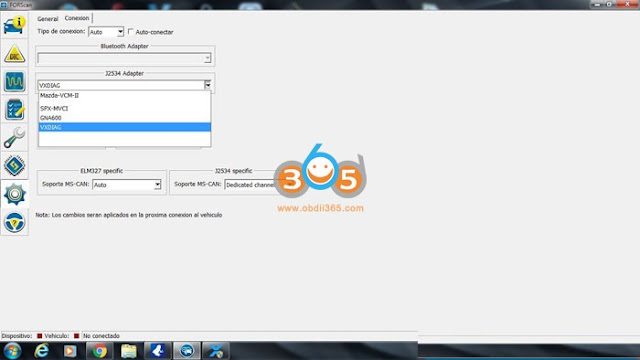
And second configure ForScan how this image:

Better run Forscan as administrator and select J2534 adapter as VXDIAG

Set up VXDIAG VCX NANO with Ford ForScan 2
It’s run perfectly

Update the VCX manager and drivers to the latest version.


Set up VXDIAG VCX NANO with Ford FJDS/FDRS

Here is the procedure with FDRS. FJDS is very similar, just use different license. Make you you have the required FJDS license from Motorcraft.

Tools you will need:

– Windows PC with 4GB RAM or greater, running Windows 10 natively (Macs running Windows bootcamp or other VM based solutions are known to cause issues)
– VXDIAG VCX Nano Ford interface
– USB Flash drive 64GB or larger (must be formatted to exFAT)
– 12V Automotive Battery Charger/Maintainer (can be purchased from Amazon)

Software you will need:

– VX Manager (installs driver for your VXDIAG VCX Nano device)
– Ford Diagnostic & Repair Software (commonly known as FDRS)

Software installation (step-by-step):

1) Download the latest VX Manager installer from here
2) Start VX Manager installation, when prompted select PASSTHROUGH – J2534

Set up VXDIAG VCX NANO with Ford FDRS 1

DO NOT SELECT FORD/MAZDA – IDS. Using this IDS emulation can brick your ECU during the update process (learned the hard way)

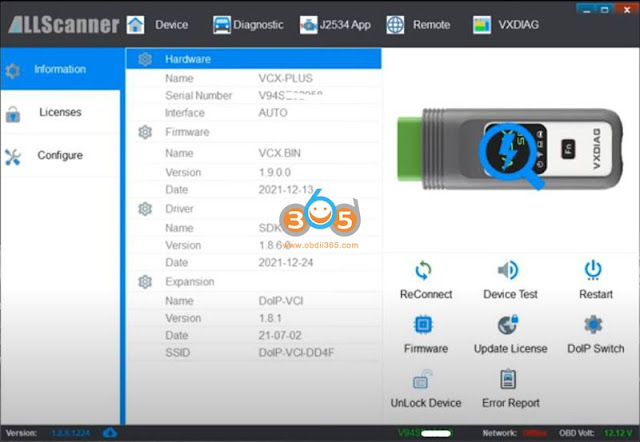
3) Connect VCX Nano Ford device to your PC using the supplied USB cable and launch VX Manager. The tool should recognize the device. If there is a device firmware available, update the device firmware
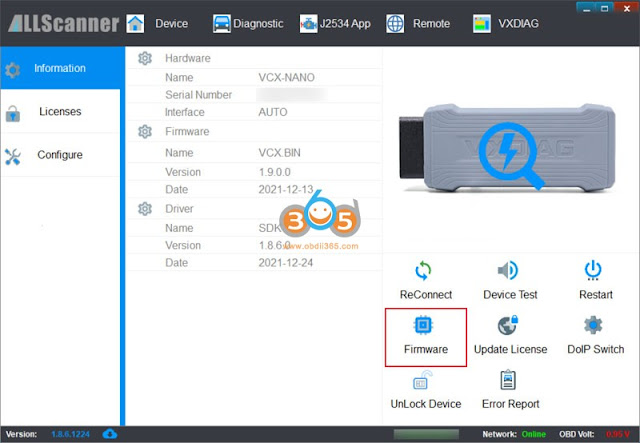

Set up VXDIAG VCX NANO with Ford FDRS 2

4) Download and install FDRS software from here. You will need a license to run this software and can be purchased here (2-day FDRS license cost $50)
5) Launch FDRS, you will be prompted to enter the license that you have just purchased. Login using your credentials created on Motorcraft website. Make sure you select Non-Dealer Motorcraft as User Type

Set up VXDIAG VCX NANO with Ford FDRS 3

6) Connect your VXC Nano Scanner to your truck’s ODBII port and connect the USB cable to the PC running FDRS. Once FDRS Device Manager pops up, make sure you select Other Device, in the drop-down dialog select VXDIAG – J2534.
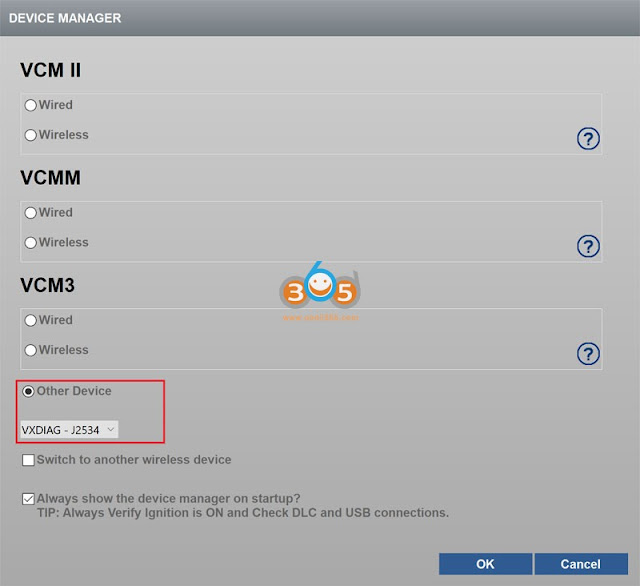
Set up VXDIAG VCX NANO with Ford FDRS 4

After this you should be greeted with this screen, meaning you are ready to go!

The icons at the bottom should be all green with battery voltage shown
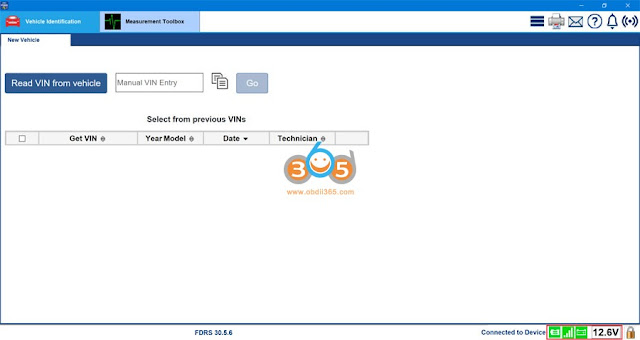
Set up VXDIAG VCX NANO with Ford FDRS 5

Running Network Test (Intial Scan)

1) Turn Ignition On, Engine Off
2) Click Read VIN from vehicle
3) Click Go to initiate Network Scan

Once completed a new tab called Toolbox will appear at the top of your FDRS screen:
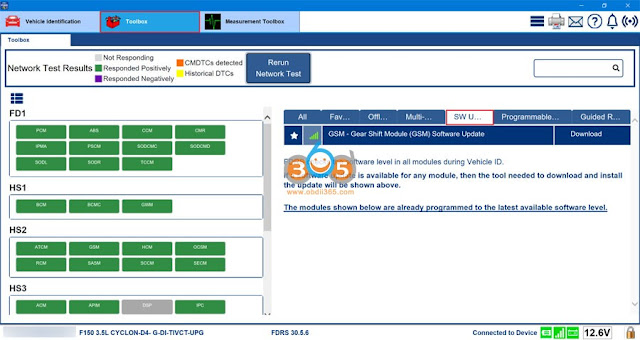
Set up VXDIAG VCX NANO with Ford FDRS 6


On the left hand side you will see all modules detected on your truck. The ones that responded positively will be marked green. On the right hand side notice the SW Updates tab. Head over here to see all available SW updates for your modules.

http://blog.obdii365.com/2022/02/18/set-up-vxdiag-vcx-nano-for-ford-ids-forscan-and-fdrs/#3

2/14/2022

How to Enable VXDIAG VCX SE Benz with Xentry Passthru?

 VXDIAG VCX SE Benz can work on Benz C6 mode with Xentry OpenShell. It can also work on Passthru Mode.  Here is the tip to set up vxdiag vcx se Benz to work on Passthru mode with Xnetry, DTS Monaco and Vediamo.


Benefits of the vcx se over Openport as Passthru:

  • The main reason for buying vxddag is that it has DoIP for new cars.
  • vcx se connects via WiFi and it’s very convenient
    there is already a Type C connector and it is held very tightly
  • vxdiag will also work on Passthru Mode
  • vxdiag allows firmware update and being able to add other brands to the device

Enable VXDIAG VCX SE Benz with Xentry Passthru 1

We will show you how to install drivers and connect via WiFi.  There is no difference through the cable USB connection.  We already tested the speed connections both via cable and via WiFi.

It is the same.


VXDIAG VCX SE Driver Setup for MB Xentry PassThru J2534:

First of all, download the latest version of the driver vx manager here

VX Manager driver 1.8.6


Install vx manager

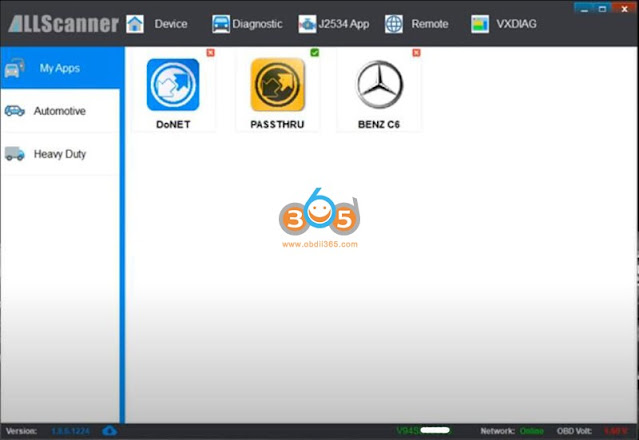
It has many programs to install. In this case, we install Passthru-J2534 program only.

Enable VXDIAG VCX SE Benz with Xentry Passthru 2

Enable VXDIAG VCX SE Benz with Xentry Passthru 3

Enable VXDIAG VCX SE Benz with Xentry Passthru 4


vcx se was connected, vx manager detects device information

Enable VXDIAG VCX SE Benz with Xentry Passthru 5

Enable VXDIAG VCX SE Benz with Xentry Passthru 6

Enable VXDIAG VCX SE Benz with Xentry Passthru 7

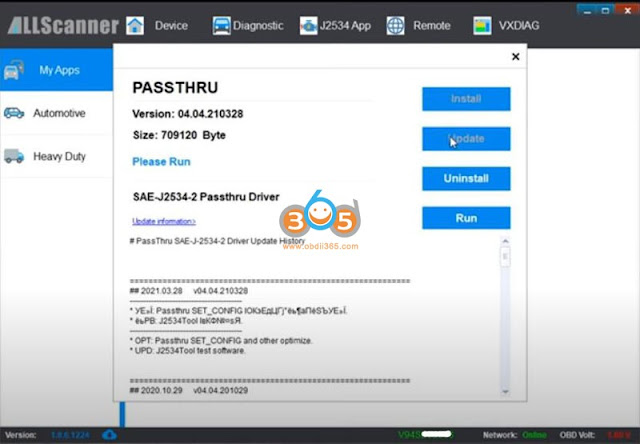
Passthru driver has been installed. DON’T install Benz C6 driver. If you have installed C6 driver, Uninstall it.
Update License
Update Firmware

Enable VXDIAG VCX SE Benz with Xentry Passthru 8

Enable VXDIAG VCX SE Benz with Xentry Passthru 9

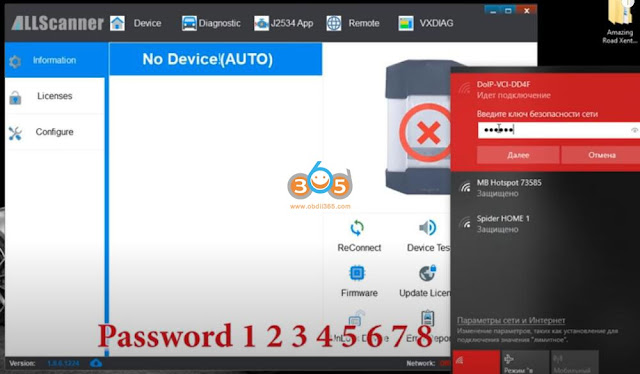
Pair vcx se with WiFi
WiFi password is :123456

Enable VXDIAG VCX SE Benz with Xentry Passthru 10
ReConnect Device

Enable VXDIAG VCX SE Benz with Xentry Passthru 11

Connect vcx se benz with vehicle via OBD socket

Enable VXDIAG VCX SE Benz with Xentry Passthru 12

Run Xentry Diagnosis program

Enable VXDIAG VCX SE Benz with Xentry Passthru 13

Choose vxdiag-j2534 as passthru device

Enable VXDIAG VCX SE Benz with Xentry Passthru 14
You can start diagnosis and coding with vcx se passthru software.


Disclaimer: We don’t have Xentry passthru software for sale. If you want to use Vxdiag passthru with Mercedes you need to buy a full Mercedes license. Vxdiag passthru license is not a general j2534 license for all brands.

www.obdii365.com

http://blog.obdii365.com/2022/02/14/set-up-vxdiag-vcx-se-benz-as-xentry-passthru/

2/08/2022

Download V2022.01 VXDIAG Subaru SSM3 & SSM4 Software

 The Subaru factory diagnostic tool costs thousands. The VxDiag Subaru is the perfect alternative and it helps you out. It is much cheaper than Subaru's real deal. The 2022 version software has been tested and verified working without issue by obdii365.com technician.


Software version:

  • SSM3 2021.01;
  • SSM4 V28.6.0;
  • FlashWrite2 V1.3.9
  • Subaru Patch

V2022.01 VXDIAG Subaru SSM3 & SSM4  1

Operating system:

  • Windows 7
  • Windows 8
  • Windows 10

Compatible device: 

Language:

  • SSM3 Language: English, German, Spanish, French, Italian
  • SSM4 Language: English, Japanese, French, German, Spanish, Italian, Russian, Chinese, Polish


Free Download VXDIAG Subaru SSM3 SSM4 2022.01 Software

https://mega.nz/folder/ucIEhR7J#QUGAbagyLLsCslE585Fu2Q/folder/KcIiBThY

Contains: SSM3 2022.1; SSM4 V28.60; FlashWrite2

Free Download Subaru SSM4 Patch (MUST INSTALL PATCH)

https://mega.nz/folder/zJASHJ6b#FgXQQluqoFyVSKkQ2k5KMw


SSM3 V2022.01

V2022.01 VXDIAG Subaru SSM3 & SSM4  2

V2022.01 VXDIAG Subaru SSM3 & SSM4 3

SSM4 V28.6.0

V2022.01 VXDIAG Subaru SSM3 & SSM4 4

Installation Steps:

Install FlashWrite setup

Install SSM3 setup

Install SSM4 setup

Install VX Manager

Run Patch


Software installation guide is the same as the previous 2020 version, check

https://youtu.be/1eVAQ_NNMeY

SSM3 does not require activation, SSM4 28.6.0 and later version does.

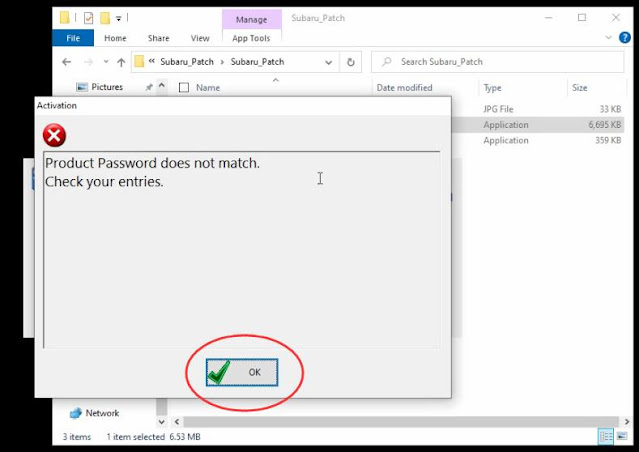
When run SSM4 from patch, it says the product password does not match.

activate vxdiag subaru ssm4 1

activate vxdiag subaru ssm4 2

Press OK will bring you a dialog below

Copy Product ID

activate vxdiag subaru ssm4 3

Run SubaruID program, paste Product ID here

activate vxdiag subaru ssm4 4

Run SSM4 from patch again. Software is ready to use.


http://blog.obdii365.com/2022/02/09/download-install-and-activate-v2022-01-vxdiag-subaru-ssm3-ssm4/

1/17/2022

Program Honda Civic ECU with VXDIAG VCX NANO as J2534 Passthru

 We are going to be testing out the vxdiag vcx nano ford as a J2534 passthru on a Honda Civic 2012.

Program Honda Civic ECU with VXDIAG VCX NANO 1

We got the Honda program (Honda J2534 Passthru ECU Reprogramming) up right now.

Program Honda Civic ECU with VXDIAG VCX NANO 2

Program Honda Civic ECU with VXDIAG VCX NANO 3

Program Honda Civic ECU with VXDIAG VCX NANO 4

and current program id available update system so as we can see there is a update on civic.

We'll press enter to start to control module update

Make sure everything goes good and right now it's programming now you got to remember that you do need a stable internet connection for update.

We are currently at thirty percent I'll hold this here it does take a little bit of time.

The update has been done i'll bring up the bulletin for it later.

I'm not actually connected to the internet because there is a database into the honda program that has specific ecu updates onto it so there was no need for me to actually go in and be online.
So right now as you can tell see all the information that's being transferred onto the password device.

Program Honda Civic ECU with VXDIAG VCX NANO 5

Program Honda Civic ECU with VXDIAG VCX NANO 6

Make sure that you are on a battery maintainer to make sure that the ecu has the proper amount of voltage and amperage going to it at all times because as the updates are being done.

it's cycling through different modules and different modules will be powering up powering down,  and you'll have a different amount of amperage.

that's going to be drawn onto the system so it's very important to always have a battery maintainer onto it.

Go ahead let this run through i'll do this in real time i'm not going to take digging fast forward at all.

I'm just showing you guys that it does actually work as a pass-through device.

So this update is actually going pretty quick.

I was expecting it to take a little bit longer than what it is

Program Honda Civic ECU with VXDIAG VCX NANO 7

Program Honda Civic ECU with VXDIAG VCX NANO 8

so turn the ignition switch to the off position which we'll do right now and don't need to switch the on within 60 seconds.

and here you can see the new calibration file that was into it.  So this was the previous, this one's the new one

Program Honda Civic ECU with VXDIAG VCX NANO 9

and program start number and model civic update description running change

So that's it for that you can print it or you can just exit it

Program Honda Civic ECU with VXDIAG VCX NANO 10

Program Honda Civic ECU with VXDIAG VCX NANO 11

so we'll go to System real quick and in the system search the vehicle does not need an update at this time.

so now we know that all the updates are done for this vehicle with the vxdiag vcx nano for Ford and Mazda IDS, but if you get the vcx nano gm or Toyota it will do the exact same thing.


If you were ever thinking of buying a programming device or a beginner entry-level diy at your house type of deal, then the vx nano will probably be your best bet as you can tell it does work now these programs are not free that i'm using you do actually have to pay for these programs to get them working.

www.obdii365.com

9/10/2021

Free Download Ford IDS V123 for VXDIAG VCM2 SVCI

 Newer version IDS V123.01 has been tested ok by obdii365.com engineer. Download software and patch here for free.

ford-ids

Software: 

Ford IDS V123.01

Mazda IDS V123


Multi-languages: English, German, French, Italian, Dutch, Spanish, Swedish, Finnish, Danish, Norwegian, Portuguese (European) , Portuguese (Brazil)

Operating system: Windows 7, Windows 8, Windows 10


For VXDIAG & VCM2

vxdiag-vcx-nano-ford

vcm2-clone

Compatible scanners:

VXDIAG VCX NANO USB/WiFi

Ford VCM2 clone using vxdiag solution

VXDIAG full brands incl. Ford


Free Download VXDIAG Ford IDS V123

https://mega.nz/folder/6dwzgaJR#XW2q1xPdbgKV4XtZQqkB0w

Including
FordIDS-123.01_full.exe
VCI_Software_1.0.0.10.exe
VCI Manager (Ford) 20.11.24.exe

Free Download VXDIAG Mazda IDS V123

https://mega.nz/folder/iQp1UACZ#d4ey2cWHmaEMf9n2dTcTAQ

Including
MazdaIDS-123.00.exe

VCI Manager (Mazda) 20.11.24.exe


Free download IDS patch 

https://mega.nz/folder/OV4RRC6B#seCWP6UCzOPWEDYlQxZ1iQ


Install Ford IDS V123

1. Install IDS Software
2. Install VCI_Software_1.0.0.10
3. Install VCI Manager(Ford) 20.11.24

4. Connect VCX device and install idspatch

5. Use idspatch to open IDs and start diagnosis.


Install Mazda IDS V123 

  1. Install mazdaids-123

2. Install VX manager and Ford IDS driver

3. Connect VCX device and install idspatch

4. Use idspatch to open IDs and start diagnosis.


Note:

1. Ford IDS requires VCI Manager driver, Mazda IDS does not.

2. Ford IDS and Mazda IDS need to be installed on separate systems.

3. Don’t install IDS on Home version windows system.


For STIC SVCI J2534

svci-j2534

Ford IDS V123

=> Setup: IDS-123.01_full

=> Driver: SVCI_J2534_Ford_Setup_v1.2.3.1

=> VCI: VCI_Software_1.0.1.16

=> Update:

=> Java 32 bit: Download


SVCI Mazda software has not been updated to V123 yet.  Contact us if you need V122 version.


SVCI J2534 is a specialized diagnostic device for Ford/Mazda. Support in-depth diagnostics and installation of vehicle control boxes. In addition, SVCI can also support Ford models until 2020 when using FDRS software.

9/09/2021

Reflash locked ECU 07 C6 Chevrolet Corvette by VXDIAG GM

 Car model and year: 2007 C6 Chevrolet Corvette


Symptom:

put my 07 base in for new harmonic balancer + a few other maint. items. I wanted to do was flash my ECU and get it back to stock. Apparently there are some applications which once applied put the thing on lockdown.


I was informed: “If ur using an aftermarket tuner like hptuners and so on. The tuner locks the ecu.”.


The next step is to unlock it and flash back in the stock OEM tune.

Someone did a re-tune on the car, and locked the tune; which locks a tech II/MDI from working with the ECM.
Note, because of this reason, most tuners will not lock an after market tune!!!!

So either need to find out how did the tune to unlock it, or will need to pull the ECM, send it a third party to unlock it and flash back in the stock OEM tune.


Clearing and reflashing a ECM to your car from aftermarket cost around $60, while unless you have the means to re-flash the new one, add on another $200 for dealer to flash the stock OEM tune in the car and do the needed relearns, after you tow the car to the dealer to have them flash in the OEM tune in the first place. So here, your into the cost about $350, and still at the mercy of the dealer every time you need to use a Tech II on the car for any reason.

So really, the best way to go is to have the old one cleared at least from third party ($60), Re-install it in the car and use TIS2000 with a VXDIAG VCX NANO GM ($105 for the Nano and I can set you up with Tis2000 for free) to flash in the OEM firmware, then do the needed relearns with the VX GM Nano after the flash in the end (Tech2win software that will come with the VX GM nano for free as well). Plus, since you do have a Tech II in the end of the $180 cost, no more needed trips to the dealer every time the car needs a tech II to trouble shoot a problem, reset a module, or just cycle the abs pump when you are doing power brake bleeds on the car.

Reflash locked ECU 07 C6 Chevrolet Corvette by VXDIAG GM

Bottom line, is kind of owning a Harley, and the real cost of wrenching on the bike yourself, is having the needed special tools for that model to do so in the first place (couple grand in the end). It kind of how you can tell if a Harley rider wrenches on his own bike or not, since each new model requires a different set of tools.

So Evo rider will tend to stay with Evo motors, twin cam riders will tend to stay with twin cam’s due to the tools needed, while guys that are buying the latest M8 model each year (whole different set of specialty tools, then Evo or twin cam), don’t even have a clue how to even change a spark plug, since it dealer warranty wrenched on alone, and they never even start to buy the needed tool to wrench on the bike in any way instead.

And no, some of the special tools are not cheap, since take Touring model, and the needed tools to align the power train, runs $650 for the set.

So back to your problem, And it time to “learn to fish so you can feed yourself” Kind of thing, and the Tech II/MDI clone for $105 (Nano), should be one of the first tools you buy for the car, so you can wrench on it yourself (including all the needed programming yourself as well). The fact that the first time you use it, verses taking the car to the dealer to have them use there instead, plays for the tool from the start.

Could stop by once you have the ECM cleared and back in the car, to just re-flash the OEM firmware back in, and do the needed relearn after work one day with VX VCX Nano and software. Hence not only get you up and running.

You can load your laptop with all needed software for your Nano.

  1. VXDIAG GM GDS2 2020.04 software download free:

https://mega.nz/#F!jN4lSYaA!5Q_p4sZEySxLu6HVPP418A


  1. gds2 patch

https://mega.nz/file/oZ820RCJ#BXRW3mOGCC7mfMjtaJ71AzjwghBlCogoM7RNGWi9KmE


  1. Tech2win 16.02.24 software download free:

https://mega.nz/file/tIFWUIxT#XBAFZWEFPhQ3A9MtyPYfT1wojVgB1sEmt2T62nrmQcM


Operating System requirement:

C:// RAM: 4GB and above

O/S: Win7 (32bit/64bit) Pro, Win10 (64bit) Pro,

Don’t set it up on Windows Home Version

GDS2 and Tech2win can be both installed on WIN10 64Bit OS, If your tech2win unable to install on WIN10 64bit laptop, please try WIN7 32bit computer.


And the dealer will teach you how to use it at the same time, for example, how to install VXDIAG VCX NANO GM GDS2 Tech2win on Win10:

https://youtu.be/ddwfIPZnS40


After installation, the tuning laptop can function as a Tech2 or MDI.


Question: what is the current state of the art in running TIS2000 on a Win10 64bit laptop and getting it to work with a Tech2Win installation on the same machine using the VCX Nano interface? Is it possible with a reasonable amount of screwing around with virtual machines, special drivers, and general computer witchcraft?


Reply:

Walk in the park, and you just need to install the latest VM player on your machine, obdii365.com is the source of USB thumb drive (32g) with TIS2000, they will load it with TIS2000 VM, so you can download and uncompressed it on your machine to run it using VM player in windows 10.

Hence TIS2000 need to run on a Win 7 32bit version of windows, and you have to make sure to turn on 16 bit support in the operating system.
Win 10 64bit has two problems with it trying to run TIS2000, being the first is it does not have 16 bit support, and will not allow TIS2000 to run even in the win 10 32 bit version, since it blocks too much from the start. As for XP, latest Nano drivers will not work on it, so come down to having to use Win 7 32 bit for it OS (either native, or in VM shell)

Also, have posted a few times on how to build your own VM Win7 32 bit shell of TIS2000, but the real glitch is finding the correct cracked version of TIS2000 for the nano in the first place. So the last few people that have needed TIS2000, have just had them send me a USB so I can just send them back my built version that works with the nano and it latest drivers to make life simple on my part instead. Hence most of the other cracked versions of TIS2000 will load fine, but are missing the needed driver to build the Nano driver in TIS2000.

Also, keep in mind that TIS2000 only flashes up to 2009, so if the car is later than that, will need to use TDS on line instead.


Alright, good luck!

http://blog.obdii365.com/2021/09/09/07-c6-chevrolet-corvette-locked-ecu-flashing-guide/

3/23/2021

VXDIAG GDS2 2017 GM Volt Airbag Reset: worked

 Have one used 2017 GM Volt with yellow airbag light to reset, so I just picked up a VXDIAG VCX NANO GM (GDS2) scanner. I have no sensor error. I just plan to change airbags, seatbelts and a new control module.


New Restraint Module is on and programmed. But I did not reconnect the new airbags for the moment so I have some DTC in memory regarding the missing airbags. These code should go away once the new airbags are in place.

Other than that, I have this strange codes P0E65, P0D4F, P0D40 and P0CCF. The Charge port door in not connected so this is why I have the P0CCF. But the other 3 DTC are confusing and the car refuses to MOVE for the moment.

vxdiag-gds2-2017-volt-airbag-reset

Image: VXDIAG VCX Nano with GDS2 Tech2win software


How to troubleshoot with GM scan tool?

These codes won’t prevent the car from moving, it will prevent it from charging. The vehicle thinks at the time the codes were set it was connected to an ac supply.

In service mode, verify in the airbag module that the high voltage disable is not set,

DTC P0E65
The hybrid/EV powertrain control module 2 detects an open, short to ground, or short to voltage on battery charger
control circuit for 1 second.

Conditions for Running the DTC
DTC P0E65
The 12 V battery voltage is greater than 10.2 V.
Vehicle in Service Mode or the drive motor battery charger cable is connected.

Conditions for Setting the DTC
DTC P0E65
The hybrid/EV powertrain control module 2 detects an open, short to ground, or short to voltage on battery charger
control circuit for 1 second.

DTC P0D4F
Battery Charger Hybrid/EV Battery Output Voltage Sensor Circuit High Voltage

Conditions for Running the DTC
The 12 V battery voltage is greater than 10.2 V.
The vehicle is connected to an AC supply and the battery charger is charging the vehicle.

Conditions for Setting the DTC
DTC P0D4F
The battery charger DC output duty cycle is between 92% and 99%.
OR
The battery charger DC output duty cycle equals 0%.

DTC P0D40
Battery Charger Input Voltage Sensor Circuit High Voltage

Conditions for Running the DTC
P0D3F and P0D40
The 12 V battery voltage is greater than 10.2 V.
The vehicle is connected to an AC supply and the battery charger is charging the vehicle.

Conditions for Setting the DTC
DTC P0D40
The battery charger AC input duty cycle is between 92% and 99%.
OR
The battery charger AC input duty cycle equals 0%.

The Clear Secured High Voltage DTCs reset process requires scan tool interaction with two or three different
control modules in sequence and can be completed using the following steps:
1. Install EL-49642 SPS programming support tool (i.e vxdiag gm gds2).
Vehicle in Service Mode. With a scan tool select the Hybrid/EV Powertrain Control Module 2, Hybrid Battery
Pack Contactor Open Reasons data list. Verify if either the Crash Event Detected or Air Bag Deployed parameters indicate YES.
If either parameter displays YES
1. Perform the High Voltage System Inspection procedure.
If the results of the inspection procedure support enabling of the high voltage system, perform the Inflatable Restraint and Sensing Diagnostic Module function Reset High Voltage Disable Request After Crash Event Detected.
2.
3. Turn the vehicle OFF for 5 minutes.
4. Proceed to next step.
If BOTH parameters indicate NO
2.
3. Vehicle in Service Mode. With a scan tool, clear All DTCs.
NOTE: A command reject may appear on the scan tool after the first Clear Secured
High Voltage DTCs request. If this occurs, ignore this command reject and
continue to the next step.
With a scan tool, select Hybrid/EV Powertrain Control Module 2 Control Functions list. Select Clear Secured
High Voltage DTCs and follow the on-screen instructions waiting 45 seconds before exiting the screen.
4.
With a scan tool, select Hybrid/EV Powertrain Control Module Control Functions list. Select Clear Secured
High Voltage DTCs. Select Continue button waiting 45 seconds before exiting the screen.
With a scan tool, select Hybrid/EV Powertrain Control Module 2 Control Functions list. Select Clear Secured
High Voltage DTCs and follow the on-screen instructions.
6.
7. With a scan tool, clear All DTCs.
Allow the Hybrid/EV powertrain Control Modules to enter sleep mode by performing the following:
1. Turn the vehicle OFF.
2. Ensure the scan tool is not communicating with any control modules by returning to the Home screen.
Ensure the scan tool is accessible without having to open doors or otherwise cause control module wakeup.
3.
Shut all doors. Do NOT depress the brake pedal or activate any vehicle controls such as the parking
lights, fuel door release, etc.
4.
NOTE: Sleep mode is usually entered within two minutes after shutting off the
vehicle. However, activating vehicle features such as Refuel Mode may
extend this time up to 30 minutes.
5. Wait 5 minutes with the vehicle in the prescribed condition so that the modules may enter sleep mode.
8.
With a scan tool, verify the Hybrid/EV Powertrain Control Module 2 has gone to sleep by ensuring
communication is not present.
If communication is present
Repeat the previous step.
If communication is not present
9. If communication is present
Repeat the previous step.
If communication is not present
10. Start the vehicle.
Verify that no DTCs are set.
If any DTCs are set
Refer to Diagnostic Trouble Code (DTC) List – Vehicle .
If no DTCs are set
11. If any DTCs are set
Refer to Diagnostic Trouble Code (DTC) List – Vehicle .
If no DTCs are set
12. All OK.


Finally, worked!

No more codes and it runs. So excited to put this baby on the road.


http://blog.obdii365.com/2021/03/23/2017-gm-volt-airbag-light-reset-with-vxdiag-gds2/