Showing posts with label vxdiag gm. Show all posts

10/31/2023

Free Download VXDIAG GM GDS2 2023.10 Tech2win DPS

 VXDIAG VCX NANO GM (as well as vcx se, vcx DoIP GM series scanners) latest GDS2 software goes to V2023.10.19 (Oct. 2023).


Free download VXDIAG GM GDS2 V2023.10 software

GDS2 2023.10 + Tech2win + DPS

Software including:

GDS2 2023.10.19

Tech2win

DPS 4.52

(Contact www.obdii365.com customer service to send patch online)

Free Download VXDIAG GM GDS2 2023.10 Tech2win DPS 1

GDS2 Software version:

GM Global: V2023.10.19
GM China: V2023.10.12
Saab V2023.10.05
VINFAST v2021.4.0
Opel/Vauxhall V2023.4.0

Operating system: Win7/Win10

Supports Buick Enclave, Encore, Envista, Cadillac CT4, CT5, Lyriq, XT4, XT5, XT6 etc till year 2024.

VXDIAG GM GDS2 2023.10 software 1

VXDIAG GM GDS2 2023.10 software 2

How to Install VXDIAG GM GDS2 and Tech2win?

1. Install DPS 4.52

2. Install Tech2win using the AutoInstall.exe file
3. Install GDS2 using the AutoInstall.exe file

4. Install VX Manager (install passthru and GDS2/T2W drivers)
5. Run software (run GDS2 from patch, run Tech2win on desktop)
* If you are running Windows 10 you MUST disable driver signing enforcement. For detail installation instruction, check PDF here.


NOTE:

Before installing GDS 2023.10.19 software, must install DPS 4.52 software, otherwise GDS2 will report errors.

9/09/2021

Reflash locked ECU 07 C6 Chevrolet Corvette by VXDIAG GM

 Car model and year: 2007 C6 Chevrolet Corvette


Symptom:

put my 07 base in for new harmonic balancer + a few other maint. items. I wanted to do was flash my ECU and get it back to stock. Apparently there are some applications which once applied put the thing on lockdown.


I was informed: “If ur using an aftermarket tuner like hptuners and so on. The tuner locks the ecu.”.


The next step is to unlock it and flash back in the stock OEM tune.

Someone did a re-tune on the car, and locked the tune; which locks a tech II/MDI from working with the ECM.
Note, because of this reason, most tuners will not lock an after market tune!!!!

So either need to find out how did the tune to unlock it, or will need to pull the ECM, send it a third party to unlock it and flash back in the stock OEM tune.


Clearing and reflashing a ECM to your car from aftermarket cost around $60, while unless you have the means to re-flash the new one, add on another $200 for dealer to flash the stock OEM tune in the car and do the needed relearns, after you tow the car to the dealer to have them flash in the OEM tune in the first place. So here, your into the cost about $350, and still at the mercy of the dealer every time you need to use a Tech II on the car for any reason.

So really, the best way to go is to have the old one cleared at least from third party ($60), Re-install it in the car and use TIS2000 with a VXDIAG VCX NANO GM ($105 for the Nano and I can set you up with Tis2000 for free) to flash in the OEM firmware, then do the needed relearns with the VX GM Nano after the flash in the end (Tech2win software that will come with the VX GM nano for free as well). Plus, since you do have a Tech II in the end of the $180 cost, no more needed trips to the dealer every time the car needs a tech II to trouble shoot a problem, reset a module, or just cycle the abs pump when you are doing power brake bleeds on the car.

Reflash locked ECU 07 C6 Chevrolet Corvette by VXDIAG GM

Bottom line, is kind of owning a Harley, and the real cost of wrenching on the bike yourself, is having the needed special tools for that model to do so in the first place (couple grand in the end). It kind of how you can tell if a Harley rider wrenches on his own bike or not, since each new model requires a different set of tools.

So Evo rider will tend to stay with Evo motors, twin cam riders will tend to stay with twin cam’s due to the tools needed, while guys that are buying the latest M8 model each year (whole different set of specialty tools, then Evo or twin cam), don’t even have a clue how to even change a spark plug, since it dealer warranty wrenched on alone, and they never even start to buy the needed tool to wrench on the bike in any way instead.

And no, some of the special tools are not cheap, since take Touring model, and the needed tools to align the power train, runs $650 for the set.

So back to your problem, And it time to “learn to fish so you can feed yourself” Kind of thing, and the Tech II/MDI clone for $105 (Nano), should be one of the first tools you buy for the car, so you can wrench on it yourself (including all the needed programming yourself as well). The fact that the first time you use it, verses taking the car to the dealer to have them use there instead, plays for the tool from the start.

Could stop by once you have the ECM cleared and back in the car, to just re-flash the OEM firmware back in, and do the needed relearn after work one day with VX VCX Nano and software. Hence not only get you up and running.

You can load your laptop with all needed software for your Nano.

  1. VXDIAG GM GDS2 2020.04 software download free:

https://mega.nz/#F!jN4lSYaA!5Q_p4sZEySxLu6HVPP418A


  1. gds2 patch

https://mega.nz/file/oZ820RCJ#BXRW3mOGCC7mfMjtaJ71AzjwghBlCogoM7RNGWi9KmE


  1. Tech2win 16.02.24 software download free:

https://mega.nz/file/tIFWUIxT#XBAFZWEFPhQ3A9MtyPYfT1wojVgB1sEmt2T62nrmQcM


Operating System requirement:

C:// RAM: 4GB and above

O/S: Win7 (32bit/64bit) Pro, Win10 (64bit) Pro,

Don’t set it up on Windows Home Version

GDS2 and Tech2win can be both installed on WIN10 64Bit OS, If your tech2win unable to install on WIN10 64bit laptop, please try WIN7 32bit computer.


And the dealer will teach you how to use it at the same time, for example, how to install VXDIAG VCX NANO GM GDS2 Tech2win on Win10:

https://youtu.be/ddwfIPZnS40


After installation, the tuning laptop can function as a Tech2 or MDI.


Question: what is the current state of the art in running TIS2000 on a Win10 64bit laptop and getting it to work with a Tech2Win installation on the same machine using the VCX Nano interface? Is it possible with a reasonable amount of screwing around with virtual machines, special drivers, and general computer witchcraft?


Reply:

Walk in the park, and you just need to install the latest VM player on your machine, obdii365.com is the source of USB thumb drive (32g) with TIS2000, they will load it with TIS2000 VM, so you can download and uncompressed it on your machine to run it using VM player in windows 10.

Hence TIS2000 need to run on a Win 7 32bit version of windows, and you have to make sure to turn on 16 bit support in the operating system.
Win 10 64bit has two problems with it trying to run TIS2000, being the first is it does not have 16 bit support, and will not allow TIS2000 to run even in the win 10 32 bit version, since it blocks too much from the start. As for XP, latest Nano drivers will not work on it, so come down to having to use Win 7 32 bit for it OS (either native, or in VM shell)

Also, have posted a few times on how to build your own VM Win7 32 bit shell of TIS2000, but the real glitch is finding the correct cracked version of TIS2000 for the nano in the first place. So the last few people that have needed TIS2000, have just had them send me a USB so I can just send them back my built version that works with the nano and it latest drivers to make life simple on my part instead. Hence most of the other cracked versions of TIS2000 will load fine, but are missing the needed driver to build the Nano driver in TIS2000.

Also, keep in mind that TIS2000 only flashes up to 2009, so if the car is later than that, will need to use TDS on line instead.


Alright, good luck!

http://blog.obdii365.com/2021/09/09/07-c6-chevrolet-corvette-locked-ecu-flashing-guide/

3/23/2021

VXDIAG GDS2 2017 GM Volt Airbag Reset: worked

 Have one used 2017 GM Volt with yellow airbag light to reset, so I just picked up a VXDIAG VCX NANO GM (GDS2) scanner. I have no sensor error. I just plan to change airbags, seatbelts and a new control module.


New Restraint Module is on and programmed. But I did not reconnect the new airbags for the moment so I have some DTC in memory regarding the missing airbags. These code should go away once the new airbags are in place.

Other than that, I have this strange codes P0E65, P0D4F, P0D40 and P0CCF. The Charge port door in not connected so this is why I have the P0CCF. But the other 3 DTC are confusing and the car refuses to MOVE for the moment.

vxdiag-gds2-2017-volt-airbag-reset

Image: VXDIAG VCX Nano with GDS2 Tech2win software


How to troubleshoot with GM scan tool?

These codes won’t prevent the car from moving, it will prevent it from charging. The vehicle thinks at the time the codes were set it was connected to an ac supply.

In service mode, verify in the airbag module that the high voltage disable is not set,

DTC P0E65
The hybrid/EV powertrain control module 2 detects an open, short to ground, or short to voltage on battery charger
control circuit for 1 second.

Conditions for Running the DTC
DTC P0E65
The 12 V battery voltage is greater than 10.2 V.
Vehicle in Service Mode or the drive motor battery charger cable is connected.

Conditions for Setting the DTC
DTC P0E65
The hybrid/EV powertrain control module 2 detects an open, short to ground, or short to voltage on battery charger
control circuit for 1 second.

DTC P0D4F
Battery Charger Hybrid/EV Battery Output Voltage Sensor Circuit High Voltage

Conditions for Running the DTC
The 12 V battery voltage is greater than 10.2 V.
The vehicle is connected to an AC supply and the battery charger is charging the vehicle.

Conditions for Setting the DTC
DTC P0D4F
The battery charger DC output duty cycle is between 92% and 99%.
OR
The battery charger DC output duty cycle equals 0%.

DTC P0D40
Battery Charger Input Voltage Sensor Circuit High Voltage

Conditions for Running the DTC
P0D3F and P0D40
The 12 V battery voltage is greater than 10.2 V.
The vehicle is connected to an AC supply and the battery charger is charging the vehicle.

Conditions for Setting the DTC
DTC P0D40
The battery charger AC input duty cycle is between 92% and 99%.
OR
The battery charger AC input duty cycle equals 0%.

The Clear Secured High Voltage DTCs reset process requires scan tool interaction with two or three different
control modules in sequence and can be completed using the following steps:
1. Install EL-49642 SPS programming support tool (i.e vxdiag gm gds2).
Vehicle in Service Mode. With a scan tool select the Hybrid/EV Powertrain Control Module 2, Hybrid Battery
Pack Contactor Open Reasons data list. Verify if either the Crash Event Detected or Air Bag Deployed parameters indicate YES.
If either parameter displays YES
1. Perform the High Voltage System Inspection procedure.
If the results of the inspection procedure support enabling of the high voltage system, perform the Inflatable Restraint and Sensing Diagnostic Module function Reset High Voltage Disable Request After Crash Event Detected.
2.
3. Turn the vehicle OFF for 5 minutes.
4. Proceed to next step.
If BOTH parameters indicate NO
2.
3. Vehicle in Service Mode. With a scan tool, clear All DTCs.
NOTE: A command reject may appear on the scan tool after the first Clear Secured
High Voltage DTCs request. If this occurs, ignore this command reject and
continue to the next step.
With a scan tool, select Hybrid/EV Powertrain Control Module 2 Control Functions list. Select Clear Secured
High Voltage DTCs and follow the on-screen instructions waiting 45 seconds before exiting the screen.
4.
With a scan tool, select Hybrid/EV Powertrain Control Module Control Functions list. Select Clear Secured
High Voltage DTCs. Select Continue button waiting 45 seconds before exiting the screen.
With a scan tool, select Hybrid/EV Powertrain Control Module 2 Control Functions list. Select Clear Secured
High Voltage DTCs and follow the on-screen instructions.
6.
7. With a scan tool, clear All DTCs.
Allow the Hybrid/EV powertrain Control Modules to enter sleep mode by performing the following:
1. Turn the vehicle OFF.
2. Ensure the scan tool is not communicating with any control modules by returning to the Home screen.
Ensure the scan tool is accessible without having to open doors or otherwise cause control module wakeup.
3.
Shut all doors. Do NOT depress the brake pedal or activate any vehicle controls such as the parking
lights, fuel door release, etc.
4.
NOTE: Sleep mode is usually entered within two minutes after shutting off the
vehicle. However, activating vehicle features such as Refuel Mode may
extend this time up to 30 minutes.
5. Wait 5 minutes with the vehicle in the prescribed condition so that the modules may enter sleep mode.
8.
With a scan tool, verify the Hybrid/EV Powertrain Control Module 2 has gone to sleep by ensuring
communication is not present.
If communication is present
Repeat the previous step.
If communication is not present
9. If communication is present
Repeat the previous step.
If communication is not present
10. Start the vehicle.
Verify that no DTCs are set.
If any DTCs are set
Refer to Diagnostic Trouble Code (DTC) List – Vehicle .
If no DTCs are set
11. If any DTCs are set
Refer to Diagnostic Trouble Code (DTC) List – Vehicle .
If no DTCs are set
12. All OK.


Finally, worked!

No more codes and it runs. So excited to put this baby on the road.


http://blog.obdii365.com/2021/03/23/2017-gm-volt-airbag-light-reset-with-vxdiag-gds2/

1/03/2019

VXDIAG VCX NANO GM Saab 9-5 2006 Review

I have VXDIAG VCX Nano for GM about week. I’m using 9.250 bin.
I have only updated firmware after first run. It’s 1.2.2.9 (vcx.bin). VCXSDK is 1.4.1.0.
I’m using software which was on the CD added to package.
My Tech2WIN is working fine with Win 7 64 bit.
I can do in my 9-5 2006:
– turn ON SID2 (trip computer, alarm, speed warning etc): function: again SID programming in 6 steps. This was the main reason why I bought VCX!.
– after that I locked my radio. Two days later I found out that I need to put VIN in SID. Radio started to work again during this VIN installation. I was sooo happy after radio turned on
– read all DTC and delete them
– configure/activate/change options in DICE, AC, SID,ECU…
– read all parameters, signals, read Trionic, start adaptations in AT, check fans etc..

I can not:
– read ABS (need to check again!)
– marry radio
– proper finish SID programming with “OK” message.

Very important: I have made a modification of OBD in my car. I added Ibus and Pbus. With this great manual:
https://www.youtube.com/watch?v=r-pRSKJH-BQ
Maybe that’s a solution why I have an access to my car with VXDIAG GM.

Someone from Poland don’t have any problem with his 9-5 2002.
This is his video…
https://www.youtube.com/watch?v=x4SkQHVTWDI
He can do anything. Including integration with SPS, Globaltis and WIS!

12/26/2018

GM Tech 2 alternative: VXDIAG VCX NANO for GM?

Hopefully everyone had a Merry Christmas. Recently ran into an issue where i wanted to replace my aftermarket pioneer (didn’t like it and much prefer my smart phone) with a stock unit. Found a cheap OEM unit on obdii365.com. After install, i realized that factory head units are tied to the original cars VIN. No problem, i’ll pay the dealership to fix the issue. Only problem they outright say they CANNOT guarantee they can fix the locked status of my radio and i’d still have to pay. As an IT/Network technician, i couldn’t imagine telling people i can’t guarantee i can fix your network or pc problems, but you still owe me full price plus tax.
Enter the VXDIAG VCX Nano. I was looking into clone tech II’s for the past couple weeks and stumbled onto this gem. There is very little info on this product, but i still had more faith in this thing and myself more than my own dealership so i took the plunge. For $119 on amazon, i basically have the software version of a tech II device. I was able to unlock my radio in a matter of minutes. Have never used a real or upscale scan tool device so i can’t compare but just poking through some of the menus, it looks like i can do anything a tech II can. Kool thing is that the tech2win software runs just fine on my Windows 10 64bit laptop. Would be even cooler with a surface pro or similar tablet. I’m sure there are reasons for owning an actual tech II device over just software, but i wanted to try something different out of curiosity and explore other options for those that want an even cheaper alternative.
gm-tech2-replacement-vxdiag-gm-1

gm-tech2-replacement-vxdiag-gm-2

gm-tech2-replacement-vxdiag-gm-3

gm-tech2-replacement-vxdiag-gm-4
Tip:

OBD Connection:
you plug the device into the OBD2 port, and then you either use Wifi back to the laptop to connect that way ($129), or you can use a usb cable instead ($119).
Even through the device is using GDS2, MDI and Tech2win software on the laptop side, the only thing that I have to question is if you can drive firmware upgrades through it to reprogram modules if needed as well?
Now the bad news that maybe the op can bring us up to speed, did you mange to get the tech2 win to install on a 64 bit machine with 64 bit windows, or did you install tech2win and the rest of the software a 32windows machine only instead.

Operation system:
tech2win software:
That i did run straight from a Windows 10 64-bit laptop. Website says that GDS2 only runs from a Windows XP/7 32-bit computer. If there is a simple GDS2 test that anyone can think of for me to try, i then confirm or deny this claim. FYI i have a windows XP, 7, 8, and 10 32 & 64 bit laptops. So i could try on any operating system.

Gds2:
I fired up the GDS2 software and that indeed runs off Windows XP. But it does come with the VM software. So far everything works under my Windows 10, but like i said the GDS2 is running in the VM software.

More tips on Windows 7:
Putting tech2 win into win 7 compatibility mode is not hard to do.
Go to the start icon for tech2win, right click it and go to properties, and see if you can click the box and make it run it in win 7 mod.
If the box is grayed out and you can not do it this way, click on the windows icon, type in run in the search box, then find run program made for a previous version of windows in list it will bring out and click on that to open that program. From here, it pretty straight forward to find Tech2 win, and change tech2 win so it running in win 7 compatible mode.
As for SDS, need to see that if it has for any type of account already set up in it’s memory. Hence in VM, gds2 should run fine, but without a active account in SDS, it never going to connect to GM to pull firmware files down that way instead.
Hell who knows, and if the SDS program on the disco does not have a hidden account on it, maybe you can access GM via the cloud software instead.

Gds2:
for $119, would just about cover what most are using the tech II for on the vet anyways, but still back to the question if you have to have a X86 machine (32 bit machine with 32 bit windows software) to load the needed tech2 win software to, since it does look its a no-go on a X64 machine with window 64 bit windows install , and even a no go of trying to VM a X86 shell to run tech2 win that way on a X64 loaded version of windows on a 64 bit machine instead.
So the real question since most of the newer laptops are 64 bit, and running windows 10 64 bit, is this what you loaded the software to, and had no problems running it? Or did you have a 32 bit machine laying around to load the software to instead.
Note, there is a work around to get a 32 bit program to run on 64 bit software, but it no joy, and not sure how its going to reach to GDS2 running in a VM shell at the same time.
https://benpiper.com/2011/11/forcing…s-environment/

Tis2000:
IT works!! ok for anyone trying to use the VXDIAG GM nano with SPS this is what you need to do (order is important):
*** please note you cannot use the VM that the VXDIAG package comes with (GDS2 VM). It’s configured in such a way it won’t work with the dongle crack and caused me a lot of head scratching to find this out.
1. Create a windows XP 32bit VM using VMWare Player
  1. Make sure you add an LPT port (set to auto, not connected on startup). It doesn’t matter if your actual PC has an LPT port or not this is needed for the dongle crack later.
  2. Install VMWare tools for your VM
  3. After you have the windows VM up and running install the BOSH MDI drivers found here: http://www.boschdiagnostics.com/pro/soft…-and-mdi-2(theMDI drivers on the driver disk and vxmanager installer wouldn’t install on my xp 32bit VM but the one from bosh does).
    5.From the driver disk or from allscanner.com install the VXDIAG MDI package with pass thru driver (VXDIAG MDI manager or VXDIAG Manager)Download tis_data_1.iso, tis_data_2.iso, GM-NAO-TIS200-3_2008.iso, TIS2000DongleCrack.rar from this: http://auto-professionals.co/?dl=584…6ef7(password: mhhauto) or buy a tested TIS2000 crack  and the like6. (files / instructions in the updated.txt you may need to click the link more than once if you get an error when downloading)
    7. Mount the tis_data_1.iso in your VM (use the virtual cdrom in vmware player and attach to iso file) this will start the auto install of the TIS2000 2007.3 software)
  4. All options can be installed using the default selections however make sure you check the install checkbox above the parallel security device on the one screen.
  5. After installation is complete you can extract the TIS2000DongleCrack.rar and copy the folder to the desktop of your VM
  6. Go into the TIS2000DongleCrack folder locate the drivers folder and open it, run the DDINST32.EXE (if you get a registry error you didn’t install an LPT port in your VM), select Express and it should install the files then click ok / Exit to close.
  7. Go back to the main TIS2000DongleCrack folder and copy SCAControlUI.exe and Id.dll to c:\Program Files\cosids\bin\ (it will prompt to replace id.dll select yes).
  8. Go back to the main TIS2000DongleCrack folder into the Dongle folder and copy the 2 files in there to c:\windows\system32\ (the dongle crack is now installed)
  9. Now mount the tis_data_2.iso in your VM (use the virtual cdrom in vmware player and attach to iso file) and open TIS2000 (double click the icon on your desktop) when TIS opens it will ask you if you want to upgrade click yes.
  10. After the upgrade completes mount the GM-NAO-TIS200-3_2008.iso in your VM (use the virtual cdrom in vmware player and attach to iso file) and open TIS2000 (double click the icon on your desktop) when TIS opens it will ask you if you want to upgrade click yes.
  11. After the upgrade completes you have successfully installed TIS2000 2008.3 and the Dongle crack, now we need to configure TIS to use the VXDIAG GM nano
  12. Open TIS2000 from the icon on your desktop, select Configuration menu from the top and select IO Management.
  13. Click the Driver button, click the Browse button, locate the j2534.dll file in the window and click open (installs the J2534 Pass Thru Driver)
  14. Now click the Add button (in IO management) enter exacly “Generic Pass Thru” in Logical Name and select “J2534 Pass Thru Driver” in the Driver drop down, click OK.
  15. Select Generic Pass Thru in the list and click Properties, in the Device Name drop down select VXDIAG, (ALLScanner) and click ok then click close to close IO Management.
Now TIS2000 software is installed and configured all you have to do is connect your VXDIAG device to the PC / VM. To do this first use a usb and connect it to the PC then in the VMWare player menu go in removable devices and connect the Future Devices USB to serial converter. At this step my windows install didn’t have the basic usb to serial drivers so I connected the VM to the network (if not connected use the VMWare player menu to connect the network) and windows downloaded them from the net and installed the device as com3. you are now good to go.

At this point you can now click on SPS in TIS2000 select Generic Pass Thru as your device and your good to program!!

Satisfied, VXDIAG VCX NANO GM device works as a clone to the GM MDI.

Credits to wizzardsl writing for the how-to’s for us.

Test: turn the HVAC after blow on

living in a high humidity area so i want to turn the HVAC after blow on.
Steps:
Connect the scan tool.
Turn ON the ignition, with the engine OFF.
Select HVAC Module.
Select HVAC Systems Automatic.
Select Special Functions.
Select HVAC.
Select Afterblow Option.
Select ENTER to enable the afterblow.
When done, use the soft key to save changes.
When afterblow has been enabled by the scan tool the blower motor will operate between medium and high speed for 4 minutes after the engine has been turned off.

What is will do is turn the HVAC fan on for 4 mins, 10 mins after you tune the car off, to dry the HVAC coils off to prevent mold from growing on them.

P.S, since I have a few Gm module firmware flash file for my car stored, will check to see if it will drive them to re-flash one of the module correctly through the tool/ the software it comes with.

12/13/2018

How to setup VXDIAG GM Tech2Win on Windows 10

Tech2Win is the Diagnostic Software for 1991-2013 GM vehicles including passenger cars, light and medium duty trucks and saturn vehicles. It is the Windows PC version of the Tech2 handheld diagnostic tool.
Requirements:
IMPORTANT INFO:
  • Tech2Win will NOT work with a Windows Virtual Machine. It must be installed on a Windows PC
  • This setup guide is designed specifically for our diagnostic interface and software. It may not work with hardware/ software purchased from another vendor.
  • SPS [Service Programming System] requires an online subscription. Only offline diagnostics is supported.

Setup Tech2win on Windows 10 step-by-step:
1. Insert Disc or open the downloaded software folder. Then open the [Tech2Win] folder and open the [AutoInstall.exe] to install the software.
setup-vxdiag-gm-tech2win-1
setup-vxdiag-gm-tech2win-2
setup-vxdiag-gm-tech2win-3
2. Install the [VX Driver MDI 1.2.0.0330.exe]. After the installation is complete, go to the Windows Start menu and find the [VX Driver MDI] folder and application and open it.
setup-vxdiag-gm-tech2win-4
setup-vxdiag-gm-tech2win-5
3. The VX Driver MDI software allows you to manage the interfaces currently connected to the PC. This is where you can verify if your hardware is connected, working properly, set which type of connection type you want [USB, WiFi, Bluetooth, etc] and more.
setup-vxdiag-gm-tech2win-6

setup-vxdiag-gm-tech2win-7
4. Go to the [Diagnostic] tab on the top and go to [My Apps] then [GM GDS2/T2W]. Then click on [Install].
setup-vxdiag-gm-tech2win-8
5. Go to the Desktop and start the Tech2Win software from the desktop shortcut icon.
setup-vxdiag-gm-tech2win-9
6. Right when the software starts,  the Tech2Win-Configurator will pop up and ask you to choose which configuration you’d like. This would be based on your region or type of vehicle you’re diagnosing. In our example, we choose [North America]. Based on your region, there will be different models available from the vehicle selection menu.
A box will pop up asking you to select the manufacturer or interface you’d like to use. The interfaces available will vary based on other types of diagnostic software you may have installed.
Select [GM – MDI, D-PDU API ny Bosch]
Then Select the interface [22124708 – USB] and click [OK]
The software will start to load and then show you the main menu. Press [Enter] to continue.
setup-vxdiag-gm-tech2win-10
setup-vxdiag-gm-tech2win-11
7. Now the main VXDIAG GM Tech2Win menu will load. Press [Enter] to continue to main menu.
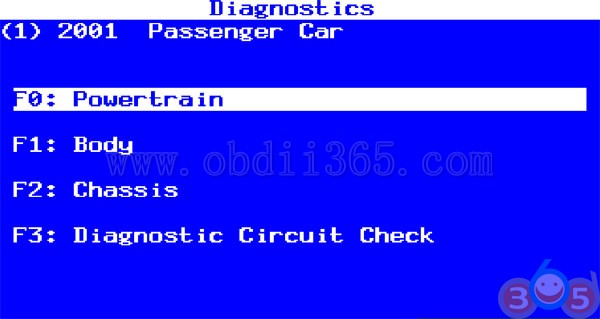
The next set of screenshots will show us going through the Diagnostic menu, selecting the
  • Model year
  • Vehicle Type
  • Powertrain, Body, Chassis
  • Engine Type
  • Transmission
  • Function you would like to perform
Some of the functions available include:
Diagnostic Trouble Codes [DTC]: Read and Clearing Diagnostic Trouble Codes
Data Display: Read real-time engine data, EVAP data, fuel trim data, misfire data, etc
Special Functions:
  • Engine Output Controls
  • Fuel System
  • IAC System
  • Crankshaft Position Variation Learn
  • Misfire Graphic
  • Service bay tests
setup-vxdiag-gm-tech2win-12

setup-vxdiag-gm-tech2win-13

setup-vxdiag-gm-tech2win-14

setup-vxdiag-gm-tech2win-15

setup-vxdiag-gm-tech2win-16