Hopefully everyone had a Merry Christmas. Recently ran into an issue where i wanted to replace my aftermarket pioneer (didn’t like it and much prefer my smart phone) with a stock unit. Found a cheap OEM unit on
obdii365.com. After install, i realized that factory head units are tied to the original cars VIN. No problem, i’ll pay the dealership to fix the issue. Only problem they outright say they CANNOT guarantee they can fix the locked status of my radio and i’d still have to pay. As an IT/Network technician, i couldn’t imagine telling people i can’t guarantee i can fix your network or pc problems, but you still owe me full price plus tax.
Enter the
VXDIAG VCX Nano. I was looking into clone tech II’s for the past couple weeks and stumbled onto this gem. There is very little info on this product, but i still had more faith in this thing and myself more than my own dealership so i took the plunge. For $119 on amazon, i basically have the software version of a
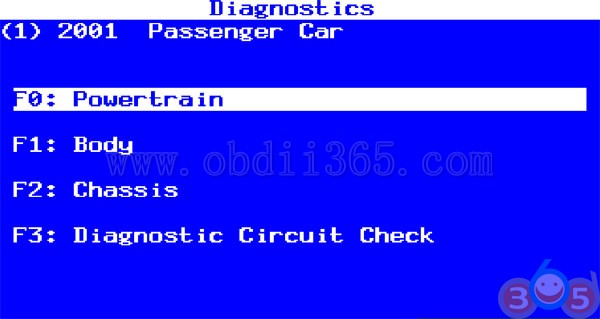
tech II device. I was able to unlock my radio in a matter of minutes. Have never used a real or upscale scan tool device so i can’t compare but just poking through some of the menus, it looks like i can do anything a tech II can. Kool thing is that the tech2win software runs just fine on my Windows 10 64bit laptop. Would be even cooler with a surface pro or similar tablet. I’m sure there are reasons for owning an actual tech II device over just software, but i wanted to try something different out of curiosity and explore other options for those that want an even cheaper alternative.
Tip:
OBD Connection:
you plug the device into the OBD2 port, and then you either use Wifi back to the laptop to connect that way ($129), or you can use a usb cable instead ($119).
Even through the device is using GDS2, MDI and Tech2win software on the laptop side, the only thing that I have to question is if you can drive firmware upgrades through it to reprogram modules if needed as well?
Now the bad news that maybe the op can bring us up to speed, did you mange to get the tech2 win to install on a 64 bit machine with 64 bit windows, or did you install tech2win and the rest of the software a 32windows machine only instead.
Operation system:
tech2win software:
That i did run straight from a Windows 10 64-bit laptop. Website says that GDS2 only runs from a Windows XP/7 32-bit computer. If there is a simple GDS2 test that anyone can think of for me to try, i then confirm or deny this claim. FYI i have a windows XP, 7, 8, and 10 32 & 64 bit laptops. So i could try on any operating system.
Gds2:
I fired up the
GDS2 software and that indeed runs off Windows XP. But it does come with the VM software. So far everything works under my Windows 10, but like i said the GDS2 is running in the VM software.
More tips on Windows 7:
Putting tech2 win into win 7 compatibility mode is not hard to do.
Go to the start icon for tech2win, right click it and go to properties, and see if you can click the box and make it run it in win 7 mod.
If the box is grayed out and you can not do it this way, click on the windows icon, type in run in the search box, then find run program made for a previous version of windows in list it will bring out and click on that to open that program. From here, it pretty straight forward to find Tech2 win, and change tech2 win so it running in win 7 compatible mode.
As for SDS, need to see that if it has for any type of account already set up in it’s memory. Hence in VM, gds2 should run fine, but without a active account in SDS, it never going to connect to GM to pull firmware files down that way instead.
Hell who knows, and if the SDS program on the disco does not have a hidden account on it, maybe you can access GM via the cloud software instead.
Gds2:
for $119, would just about cover what most are using the tech II for on the vet anyways, but still back to the question if you have to have a X86 machine (32 bit machine with 32 bit windows software) to load the needed tech2 win software to, since it does look its a no-go on a X64 machine with window 64 bit windows install , and even a no go of trying to VM a X86 shell to run tech2 win that way on a X64 loaded version of windows on a 64 bit machine instead.
So the real question since most of the newer laptops are 64 bit, and running windows 10 64 bit, is this what you loaded the software to, and had no problems running it? Or did you have a 32 bit machine laying around to load the software to instead.
Note, there is a work around to get a 32 bit program to run on 64 bit software, but it no joy, and not sure how its going to reach to GDS2 running in a VM shell at the same time.
https://benpiper.com/2011/11/forcing…s-environment/
Tis2000:
IT works!! ok for anyone trying to use the VXDIAG GM nano with SPS this is what you need to do (order is important):
*** please note you cannot use the VM that the VXDIAG package comes with (GDS2 VM). It’s configured in such a way it won’t work with the dongle crack and caused me a lot of head scratching to find this out.
1. Create a windows XP 32bit VM using VMWare Player
- Make sure you add an LPT port (set to auto, not connected on startup). It doesn’t matter if your actual PC has an LPT port or not this is needed for the dongle crack later.
- Install VMWare tools for your VM
- After you have the windows VM up and running install the BOSH MDI drivers found here: http://www.boschdiagnostics.com/pro/soft…-and-mdi-2(theMDI drivers on the driver disk and vxmanager installer wouldn’t install on my xp 32bit VM but the one from bosh does).
5.From the driver disk or from allscanner.com install the VXDIAG MDI package with pass thru driver (VXDIAG MDI manager or VXDIAG Manager)Download tis_data_1.iso, tis_data_2.iso, GM-NAO-TIS200-3_2008.iso, TIS2000DongleCrack.rar from this: http://auto-professionals.co/?dl=584…6ef7(password: mhhauto) or buy a tested TIS2000 crack and the like6. (files / instructions in the updated.txt you may need to click the link more than once if you get an error when downloading)
7. Mount the tis_data_1.iso in your VM (use the virtual cdrom in vmware player and attach to iso file) this will start the auto install of the TIS2000 2007.3 software)
- All options can be installed using the default selections however make sure you check the install checkbox above the parallel security device on the one screen.
- After installation is complete you can extract the TIS2000DongleCrack.rar and copy the folder to the desktop of your VM
- Go into the TIS2000DongleCrack folder locate the drivers folder and open it, run the DDINST32.EXE (if you get a registry error you didn’t install an LPT port in your VM), select Express and it should install the files then click ok / Exit to close.
- Go back to the main TIS2000DongleCrack folder and copy SCAControlUI.exe and Id.dll to c:\Program Files\cosids\bin\ (it will prompt to replace id.dll select yes).
- Go back to the main TIS2000DongleCrack folder into the Dongle folder and copy the 2 files in there to c:\windows\system32\ (the dongle crack is now installed)
- Now mount the tis_data_2.iso in your VM (use the virtual cdrom in vmware player and attach to iso file) and open TIS2000 (double click the icon on your desktop) when TIS opens it will ask you if you want to upgrade click yes.
- After the upgrade completes mount the GM-NAO-TIS200-3_2008.iso in your VM (use the virtual cdrom in vmware player and attach to iso file) and open TIS2000 (double click the icon on your desktop) when TIS opens it will ask you if you want to upgrade click yes.
- After the upgrade completes you have successfully installed TIS2000 2008.3 and the Dongle crack, now we need to configure TIS to use the VXDIAG GM nano
- Open TIS2000 from the icon on your desktop, select Configuration menu from the top and select IO Management.
- Click the Driver button, click the Browse button, locate the j2534.dll file in the window and click open (installs the J2534 Pass Thru Driver)
- Now click the Add button (in IO management) enter exacly “Generic Pass Thru” in Logical Name and select “J2534 Pass Thru Driver” in the Driver drop down, click OK.
- Select Generic Pass Thru in the list and click Properties, in the Device Name drop down select VXDIAG, (ALLScanner) and click ok then click close to close IO Management.
Now TIS2000 software is installed and configured all you have to do is connect your VXDIAG device to the PC / VM. To do this first use a usb and connect it to the PC then in the VMWare player menu go in removable devices and connect the Future Devices USB to serial converter. At this step my windows install didn’t have the basic usb to serial drivers so I connected the VM to the network (if not connected use the VMWare player menu to connect the network) and windows downloaded them from the net and installed the device as com3. you are now good to go.
At this point you can now click on SPS in TIS2000 select Generic Pass Thru as your device and your good to program!!
Credits to wizzardsl writing for the how-to’s for us.
Test: turn the HVAC after blow on
living in a high humidity area so i want to turn the HVAC after blow on.
Steps:
Connect the scan tool.
Turn ON the ignition, with the engine OFF.
Select HVAC Module.
Select HVAC Systems Automatic.
Select Special Functions.
Select HVAC.
Select Afterblow Option.
Select ENTER to enable the afterblow.
When done, use the soft key to save changes.
When afterblow has been enabled by the scan tool the blower motor will operate between medium and high speed for 4 minutes after the engine has been turned off.
What is will do is turn the HVAC fan on for 4 mins, 10 mins after you tune the car off, to dry the HVAC coils off to prevent mold from growing on them.
P.S, since I have a few Gm module firmware flash file for my car stored, will check to see if it will drive them to re-flash one of the module correctly through the tool/ the software it comes with.